May 2, 2016Comments are off for this post.

Cinema 4D Quicktip: Generate a Vertex Map based on Point Level Velocity

[fusion_builder_container hundred_percent="yes" overflow="visible"][fusion_builder_row][fusion_builder_column type="2_3" last="no" spacing="yes" center_content="no" hide_on_mobile="no" background_color="" background_image="" background_repeat="no-repeat" background_position="left top" hover_type="none" link="" border_position="all" border_size="0px" border_color="" border_style="" padding="" margin_top="" margin_bottom="" animation_type="" animation_direction="" animation_speed="0.1" animation_offset="" class="" id=""][fusion_vimeo id="141650974" width="640" height="360" autoplay="no" api_params="&portrait=0&byline=0&badge=0&title=0&color=ffffff" class=""/][/fusion_builder_column][fusion_builder_column type="1_3" last="yes" spacing="yes" center_content="no" hide_on_mobile="no" background_color="" background_image="" background_repeat="no-repeat" background_position="left top" hover_type="none" link="" border_position="all" border_size="0px" border_color="" border_style="" padding="" margin_top="" margin_bottom="" animation_type="" animation_direction="" animation_speed="0.1" animation_offset="" class="" id=""][fusion_text]

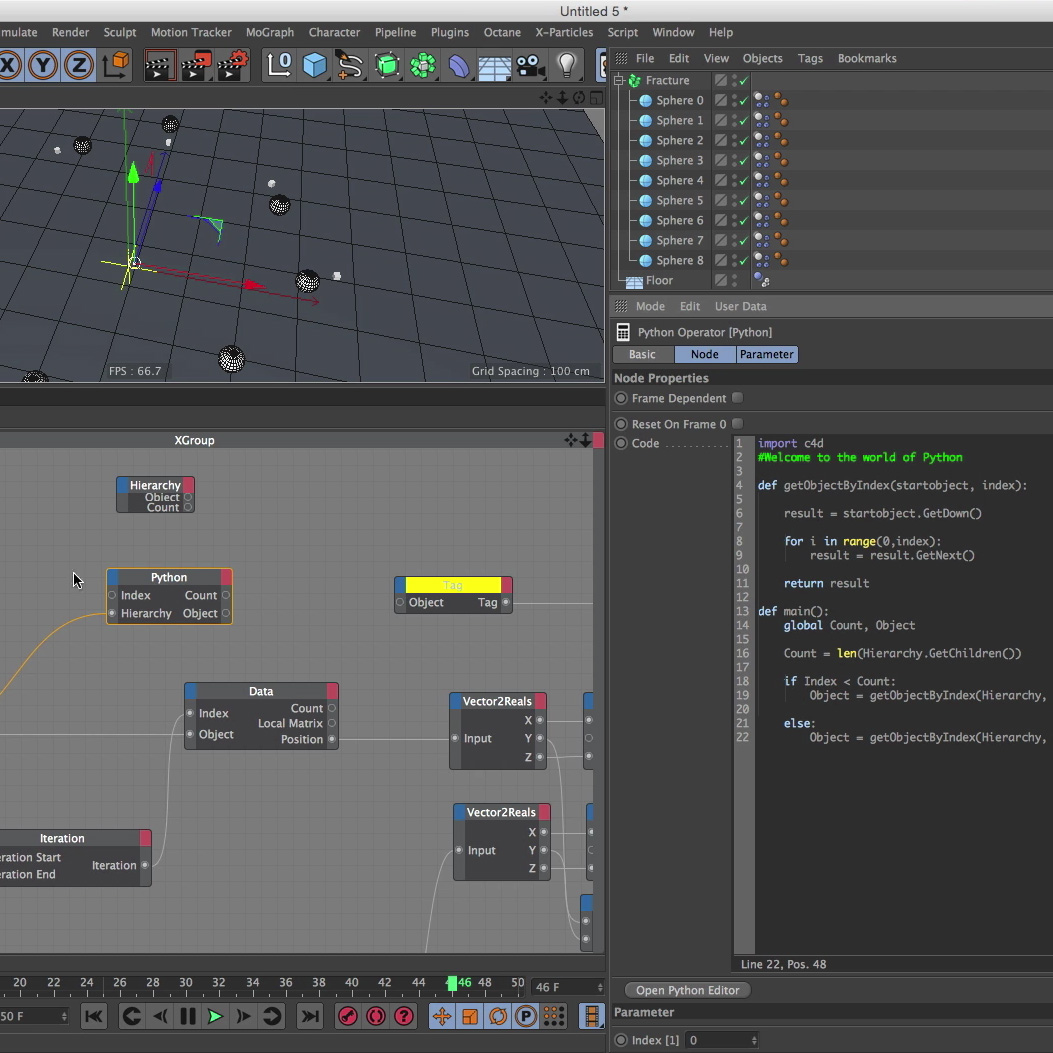
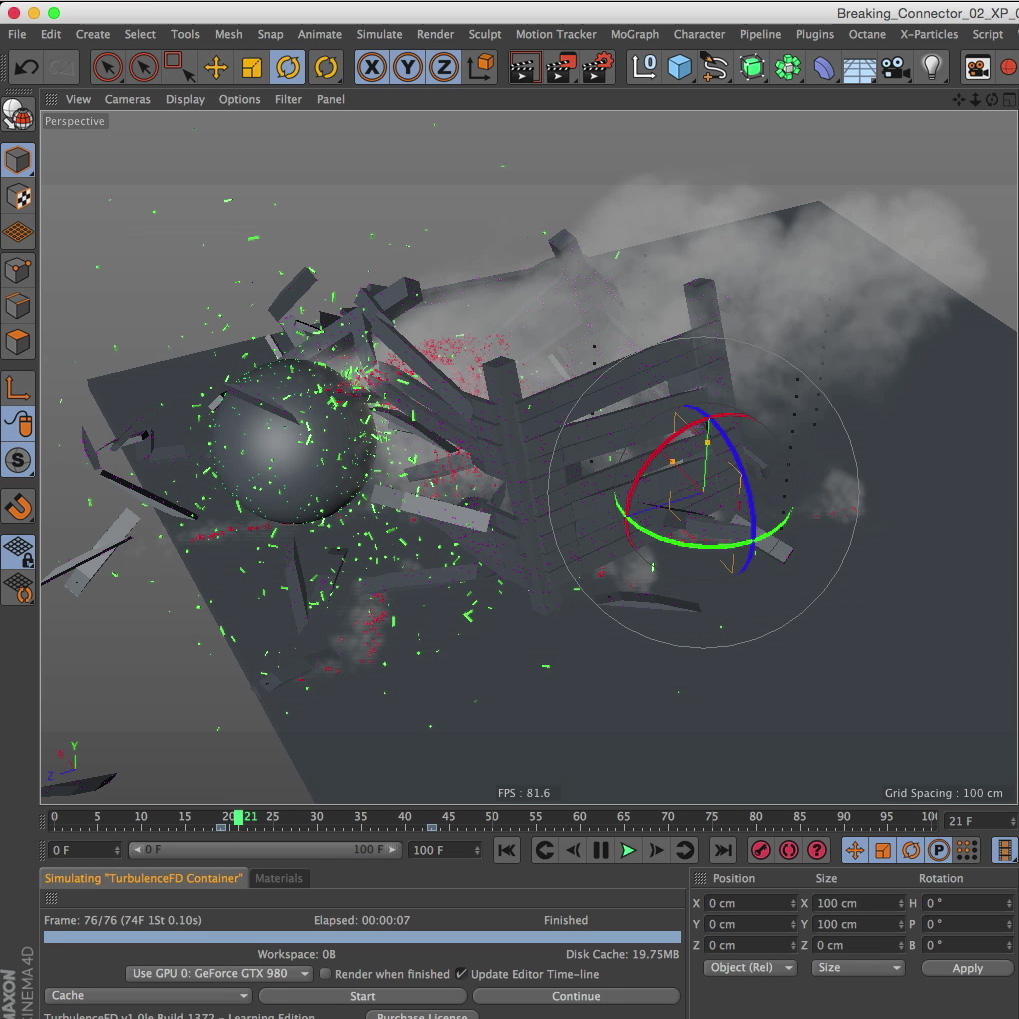
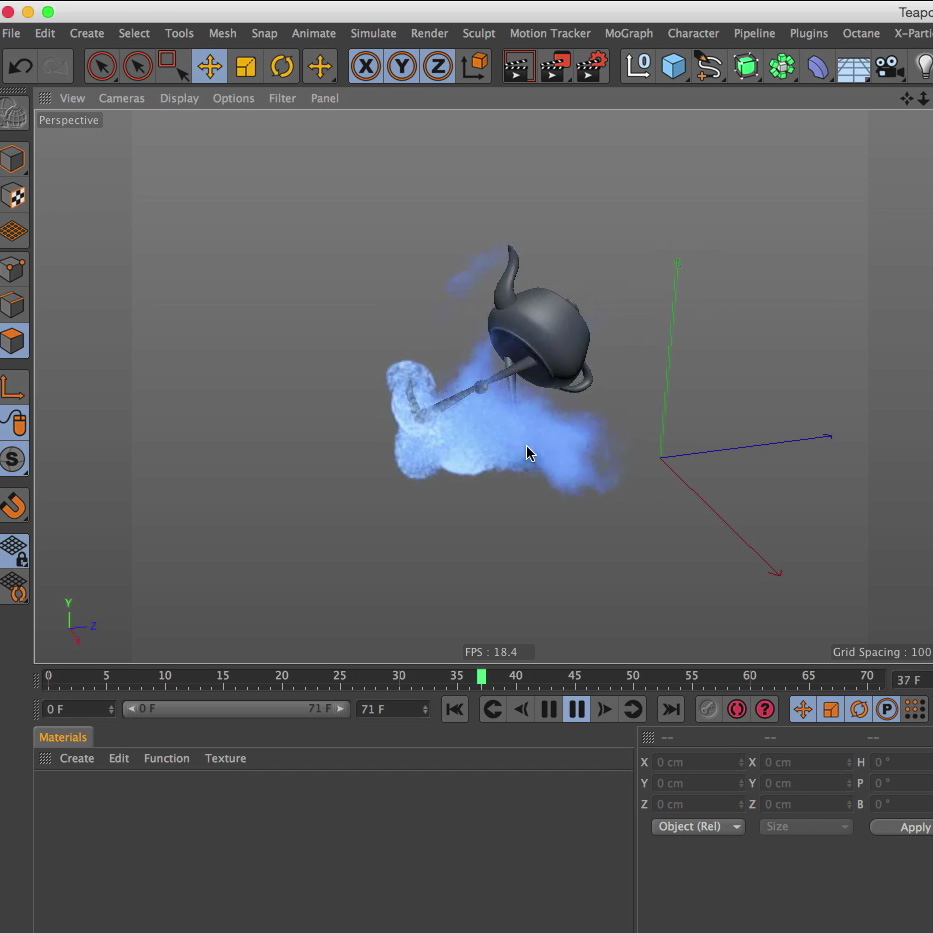
In this short tutorial I show you how to use the PLA Vertex Map XPresso script to generate a Vertex Map based on individual point velocity. So each point's speed determines how much vertex weight is applied to the map.

Here is the Link to the .c4d file: florianthamer.com/wp-content/uploads/2015/10/PLA_Script.zip

Credit's go to Yader for the original concept of the script.
Yader's vimeo channel: vimeo.com/yader[/fusion_text][/fusion_builder_column][/fusion_builder_row][/fusion_builder_container]

May 2, 2016Comments are off for this post.

Cinema 4D Tutorial: How to tear up Geometry using Cloth Dynamics

[fusion_builder_container hundred_percent="yes" overflow="visible"][fusion_builder_row][fusion_builder_column type="2_3" last="no" spacing="yes" center_content="no" hide_on_mobile="no" background_color="" background_image="" background_repeat="no-repeat" background_position="left top" hover_type="none" link="" border_position="all" border_size="0px" border_color="" border_style="" padding="" margin_top="" margin_bottom="" animation_type="" animation_direction="" animation_speed="0.1" animation_offset="" class="" id=""][fusion_vimeo id="159532261" width="640" height="360" autoplay="no" api_params="&portrait=0&byline=0&badge=0&title=0&color=ffffff" class=""/][/fusion_builder_column][fusion_builder_column type="1_3" last="yes" spacing="yes" center_content="no" hide_on_mobile="no" background_color="" background_image="" background_repeat="no-repeat" background_position="left top" hover_type="none" link="" border_position="all" border_size="0px" border_color="" border_style="" padding="" margin_top="" margin_bottom="" animation_type="" animation_direction="" animation_speed="0.1" animation_offset="" class="" id=""][fusion_text]

In this tutorial I explain how to tear up geometry using Cinema 4D's Cloth Dynamics while keeping an object's animation intact.
I also explain how to use XPresso and a MoGraph Effector to paint a Vertex Map onto any surface

[/fusion_text][/fusion_builder_column][/fusion_builder_row][/fusion_builder_container]

May 2, 2016Comments are off for this post.

Cinema 4D Tutorial: How to manipulate hundreds of Deformers with a MoGraph Effector and XPresso

[fusion_builder_container hundred_percent="yes" overflow="visible"][fusion_builder_row][fusion_builder_column type="2_3" last="no" spacing="yes" center_content="no" hide_on_mobile="no" background_color="" background_image="" background_repeat="no-repeat" background_position="left top" hover_type="none" link="" border_position="all" border_size="0px" border_color="" border_style="" padding="" margin_top="" margin_bottom="" animation_type="" animation_direction="" animation_speed="0.1" animation_offset="" class="" id=""][fusion_vimeo id="159380981" width="640" height="360" autoplay="no" api_params="&portrait=0&byline=0&badge=0&title=0&color=ffffff" class=""/][/fusion_builder_column][fusion_builder_column type="1_3" last="yes" spacing="yes" center_content="no" hide_on_mobile="no" background_color="" background_image="" background_repeat="no-repeat" background_position="left top" hover_type="none" link="" border_position="all" border_size="0px" border_color="" border_style="" padding="" margin_top="" margin_bottom="" animation_type="" animation_direction="" animation_speed="0.1" animation_offset="" class="" id=""][fusion_text]

In this tutorial I'll show you how to use a MoGraph Effector to control loads of Spherify Deformers.

Project File: https://florianthamer.com/wp-content/uploads/2016/05/Boiling_Head.zip[/fusion_text][/fusion_builder_column][/fusion_builder_row][/fusion_builder_container]

May 2, 2016Comments are off for this post.

Cinema 4D Tutorial: Using X-Particles for Dynamic Simulations (using XP 3.5)

[fusion_builder_container hundred_percent="yes" overflow="visible"][fusion_builder_row][fusion_builder_column type="2_3" last="no" spacing="yes" center_content="no" hide_on_mobile="no" background_color="" background_image="" background_repeat="no-repeat" background_position="left top" hover_type="none" link="" border_position="all" border_size="0px" border_color="" border_style="" padding="" margin_top="" margin_bottom="" animation_type="" animation_direction="" animation_speed="0.1" animation_offset="" class="" id=""][fusion_vimeo id="149139316" width="640" height="360" autoplay="no" api_params="&portrait=0&byline=0&badge=0&title=0&color=ffffff" class=""/][/fusion_builder_column][fusion_builder_column type="1_3" last="yes" spacing="yes" center_content="no" hide_on_mobile="no" background_color="" background_image="" background_repeat="no-repeat" background_position="left top" hover_type="none" link="" border_position="all" border_size="0px" border_color="" border_style="" padding="" margin_top="" margin_bottom="" animation_type="" animation_direction="" animation_speed="0.1" animation_offset="" class="" id=""][fusion_text]

In this tutorial I'm using the recently published X-Particles 3.5 to improve dynamics simulations with dust/debris even more.
I'm also using the Question/Answer system to have more control over the spawned debris.

This is a follow-up tutorial for this one: vimeo.com/144885464
Be sure to check it out first, as I'm not going over all the details on how this setup works.

If you haven't updated to X-Particles 3 yet you should definitely consider it now, as the 3.5 Update has A LOT of new features and improvements.

Scene file: https://florianthamer.com/wp-content/uploads/2016/05/Collision_Tut_04.c4d.zip[/fusion_text][/fusion_builder_column][/fusion_builder_row][/fusion_builder_container]

May 2, 2016Comments are off for this post.

Cinema 4D Tutorial: Using XPresso and Python to throw some Balls around

[fusion_builder_container hundred_percent="yes" overflow="visible"][fusion_builder_row][fusion_builder_column type="2_3" last="no" spacing="yes" center_content="no" hide_on_mobile="no" background_color="" background_image="" background_repeat="no-repeat" background_position="left top" hover_type="none" link="" border_position="all" border_size="0px" border_color="" border_style="" padding="" margin_top="" margin_bottom="" animation_type="" animation_direction="" animation_speed="0.1" animation_offset="" class="" id=""][fusion_vimeo id="145558798" width="640" height="360" autoplay="no" api_params="&portrait=0&byline=0&badge=0&title=0&color=ffffff" class=""/][/fusion_builder_column][fusion_builder_column type="1_3" last="yes" spacing="yes" center_content="no" hide_on_mobile="no" background_color="" background_image="" background_repeat="no-repeat" background_position="left top" hover_type="none" link="" border_position="all" border_size="0px" border_color="" border_style="" padding="" margin_top="" margin_bottom="" animation_type="" animation_direction="" animation_speed="0.1" animation_offset="" class="" id=""][fusion_text]

This this tutorial we are calculating trajectories in XPresso.
I'm using Python Script to calculate an equation that would be rather complex if it would be done with XPresso Nodes only.
I'm also showing you how to create a Python Node that let's you access a certain Object inside a Hierarchy.
I know, XPresso and Scripting tutorials are quite boring, but stay with me on this one, you maybe pick up a thing or two that you can need in one of your future projects.

Link to the trajectory Flash application: n-created.com/2013/11/12/projectile-initial-velocity-angle-to-hit-coordinate/
The .c4d files: https://florianthamer.com/wp-content/uploads/2016/05/Mortar_Tutorial.zip[/fusion_text][/fusion_builder_column][/fusion_builder_row][/fusion_builder_container]

May 2, 2016Comments are off for this post.

Cinema 4D Tutorial: X-Particles and TurbulenceFD for Dynamic Simulations

[fusion_builder_container hundred_percent="yes" overflow="visible"][fusion_builder_row][fusion_builder_column type="2_3" last="no" spacing="yes" center_content="no" hide_on_mobile="no" background_color="" background_image="" background_repeat="no-repeat" background_position="left top" hover_type="none" link="" border_position="all" border_size="0px" border_color="" border_style="" padding="" margin_top="" margin_bottom="" animation_type="" animation_direction="" animation_speed="0.1" animation_offset="" class="" id=""][fusion_vimeo id="144885464" width="640" height="360" autoplay="no" api_params="&portrait=0&byline=0&badge=0&title=0&color=ffffff" class=""/][/fusion_builder_column][fusion_builder_column type="1_3" last="yes" spacing="yes" center_content="no" hide_on_mobile="no" background_color="" background_image="" background_repeat="no-repeat" background_position="left top" hover_type="none" link="" border_position="all" border_size="0px" border_color="" border_style="" padding="" margin_top="" margin_bottom="" animation_type="" animation_direction="" animation_speed="0.1" animation_offset="" class="" id=""][fusion_text]

In this tutorial I'm going to show you how to use X-Particles and TurbulenceFD to create additional debris and dust or smoke for your C4D dynamics simulations.

Follow up Tutorial (using XP 3.5): vimeo.com/149139316

Scene File: https://florianthamer.com/wp-content/uploads/2016/05/Particles_For_Dynamics.zip
This is the scene you see at the end of the tutorial.[/fusion_text][/fusion_builder_column][/fusion_builder_row][/fusion_builder_container]

May 2, 2016Comments are off for this post.

Cinema 4D Tutorial: Smoke Flower with TurbulenceFD and XParticles

[fusion_builder_container hundred_percent="yes" overflow="visible"][fusion_builder_row][fusion_builder_column type="2_3" last="no" spacing="yes" center_content="no" hide_on_mobile="no" background_color="" background_image="" background_repeat="no-repeat" background_position="left top" hover_type="none" link="" border_position="all" border_size="0px" border_color="" border_style="" padding="" margin_top="" margin_bottom="" animation_type="" animation_direction="" animation_speed="0.1" animation_offset="" class="" id=""][fusion_vimeo id="142152491" width="640" height="360" autoplay="no" api_params="&portrait=0&byline=0&badge=0&title=0&color=ffffff" class=""/][/fusion_builder_column][fusion_builder_column type="1_3" last="yes" spacing="yes" center_content="no" hide_on_mobile="no" background_color="" background_image="" background_repeat="no-repeat" background_position="left top" hover_type="none" link="" border_position="all" border_size="0px" border_color="" border_style="" padding="" margin_top="" margin_bottom="" animation_type="" animation_direction="" animation_speed="0.1" animation_offset="" class="" id=""][fusion_text]

In this Cinema 4D tutorial I show you how to animate a blooming flower using X-Particles and TurbulenceFD.

[/fusion_text][/fusion_builder_column][/fusion_builder_row][/fusion_builder_container]